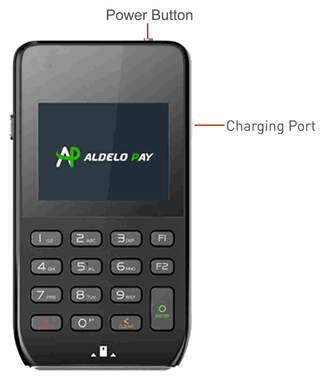
How to Setup Pax D190?
Check Out The Video Below.
PAX D190 Setup Instructions
|
1. Charge PAX D190 for 2 hours before use.
2. Press power button on the top to power on. (It may take few minutes or reboot few times). 3. Press “Enter” and “1” simultaneously, then enter today’s date as password. Enter “F2” to scroll down. 4. Press “2. COMM Settings” to enter the date password again, then press “F2” to scroll down and press “4” to choose “4. Wi-Fi Parameters”. It will search Wi-Fi signals in a while. 5. Choose the your Wi-Fi and enter your Wi-Fi password. 6. Once Wi-Fi is setup, press the red “Cancel” Key 3 times to connect your Wi-Fi. (If it shows an Error, you need to enter the correct Wi-Fi password again.) 7. Press red “Cancel” button 1 time to the beginning, then enter the password. Then press “F2” to scroll down and select “1. System Settings”. Press “F2” to scroll down and select “2. App Management”. And then enter the password again. 8. Press “1” to choose “Activate”, and press “1” to choose “Online”. Once it is activated, press the green “Enter” key and then press red “Cancel” key. |
9. Press “2” to choose “App Update”. It may take several minutes. Once it complete, the PAX D190 may reboot several times as well as download additional software.
10. Once apps finish updating, press “Enter” and “1” simultaneously, then enter the password. 11. Press “F2” to next page, and press “2” to select “2. COMM Setting”, and then enter password again. 12. To reset Wi-Fi again, press “F2” to next page and press “4” to choose “4. Wi-Fi Parameters”. It will search Wi-Fi signals in a while. 13. Choose the your Wi-Fi and enter your Wi-Fi password. 14. Once Wi-Fi is setup, press the red “Cancel” Key 3 times to connect your Wi-Fi. (If it shows an Error, you need to enter the correct Wi-Fi password again.) 15. If it shows OK which means the Wi-Fi is connected and then press red “Cancel” button 1 time to the beginning, now it’s ready to add your Point of Sale. |
