
Aldelo Express App
User Guide

|
>> 01: SIGN UP or SIGN IN
>> 02: TOUR DEMO STORES >> 03: CREATE YOUR STORE >> 04: ORDER ENTRY >> 05: CLOUD MANAGER |
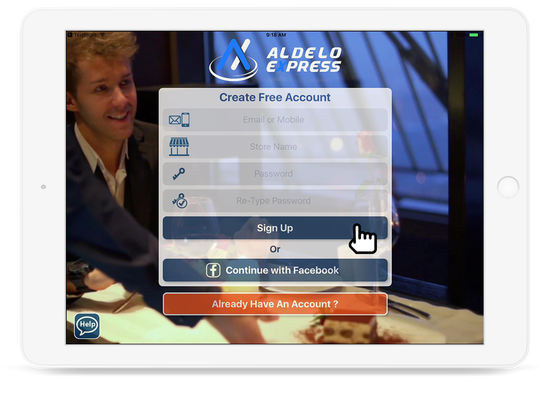
1. If you are a new user you are able to sign up using either or email mobile phone number.
|
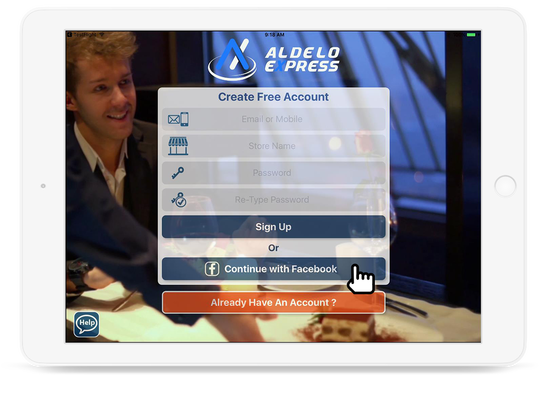
2. You also have the option of signing up using Facebook.
|
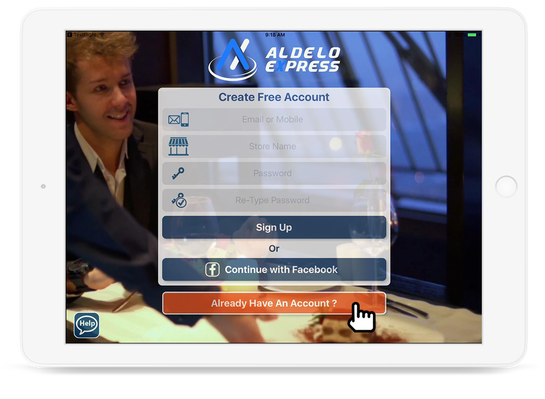
1. If you are an existing user, click "Already Have an Account" button.
|
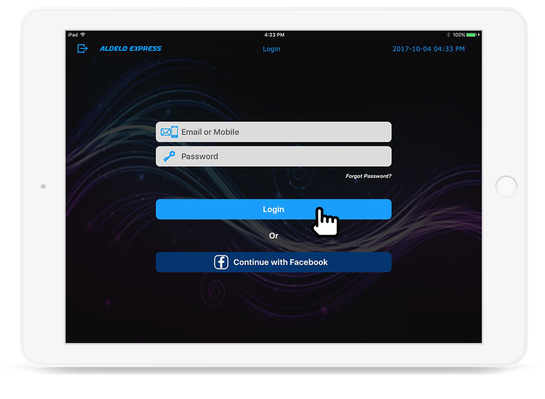
2. Sign in using either email or mobile phone number, or continue with Facebook.
|
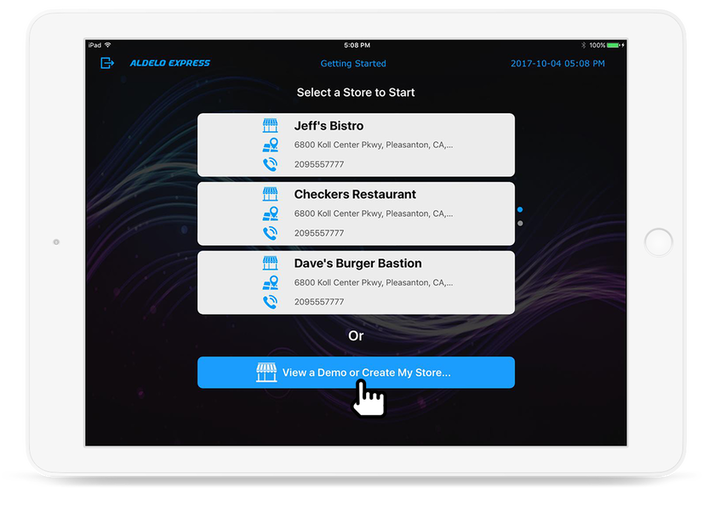
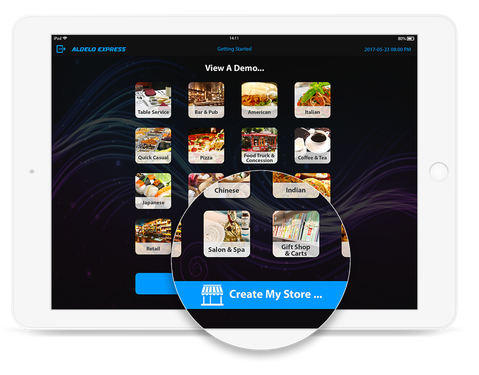
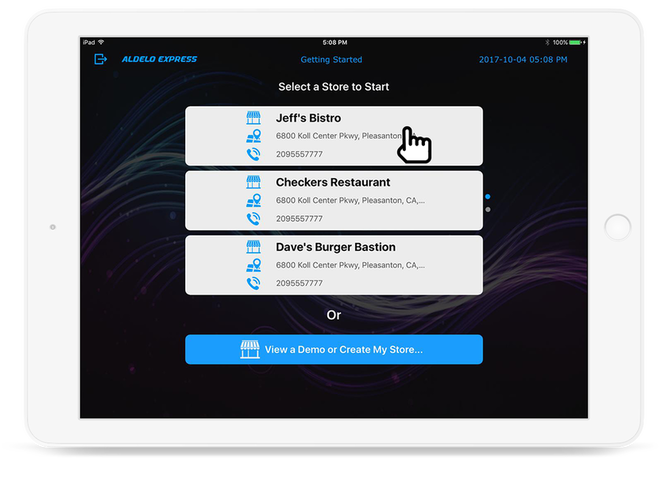
1. You have the option to view different Demo Stores or create a new store.
|
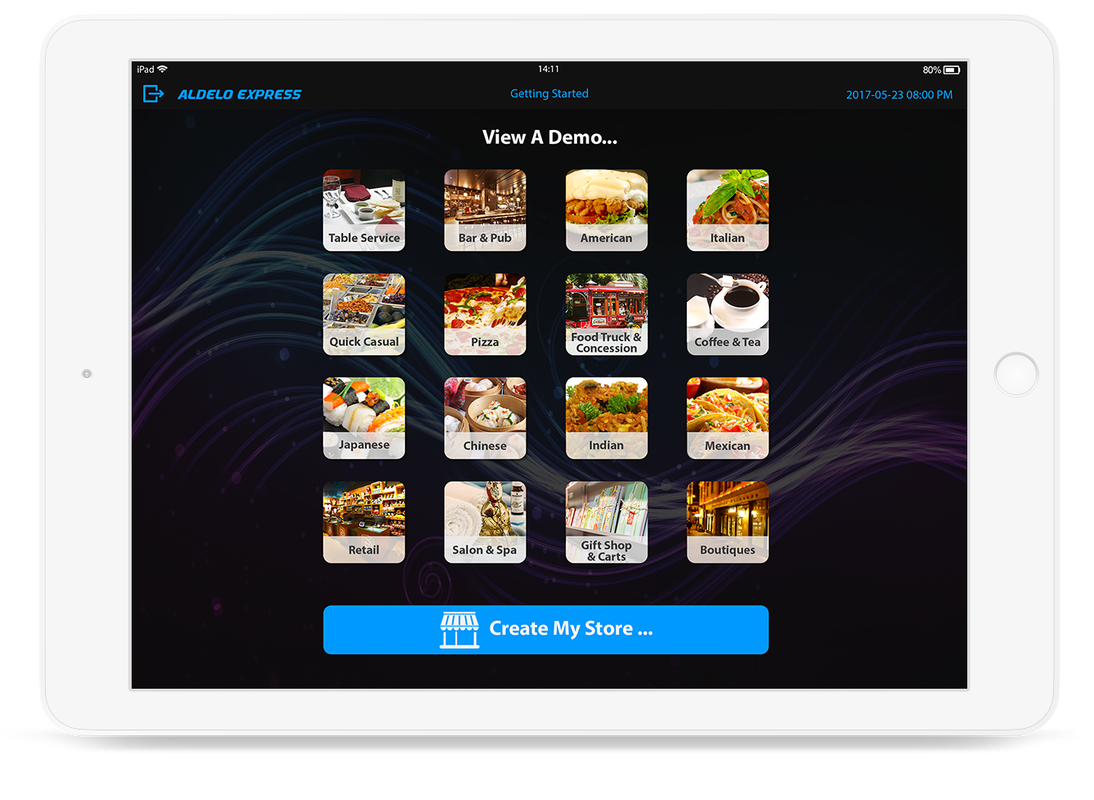
2. There are 16 different demo stores to choose from
|
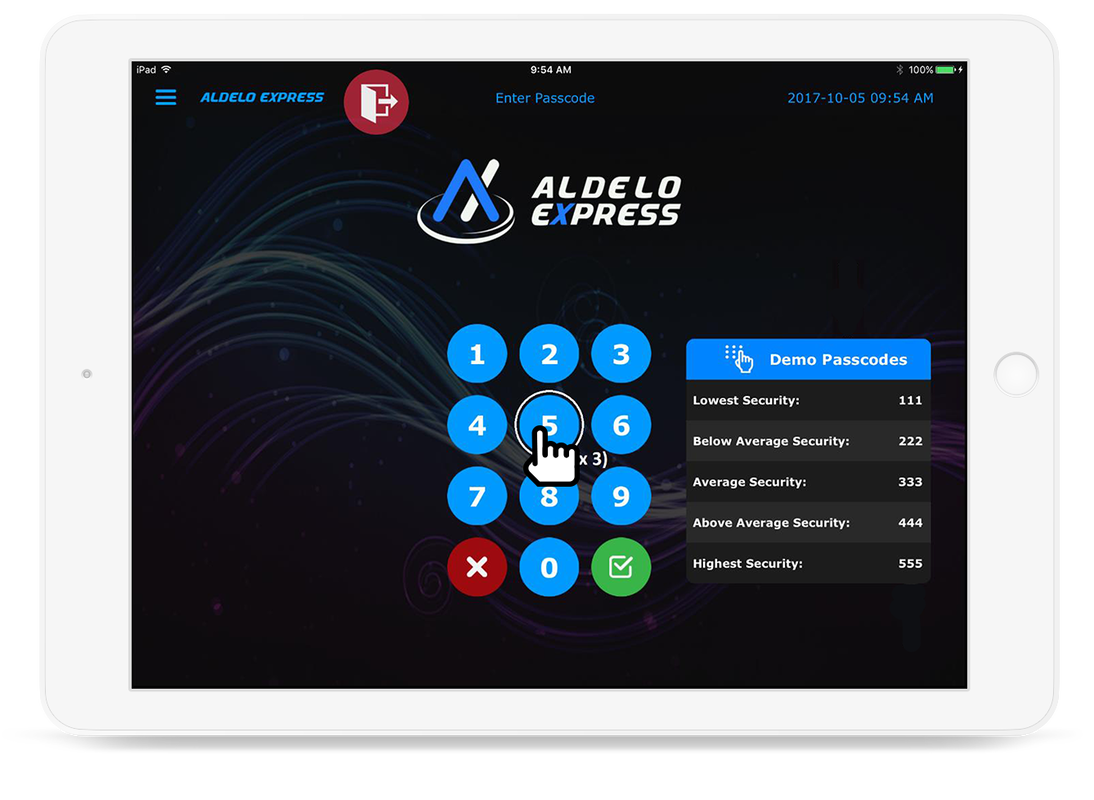
3. Once a Demo Store is selected you are able to login using the different access codes on the right.
|
4. You can then test drive the demo store.
|
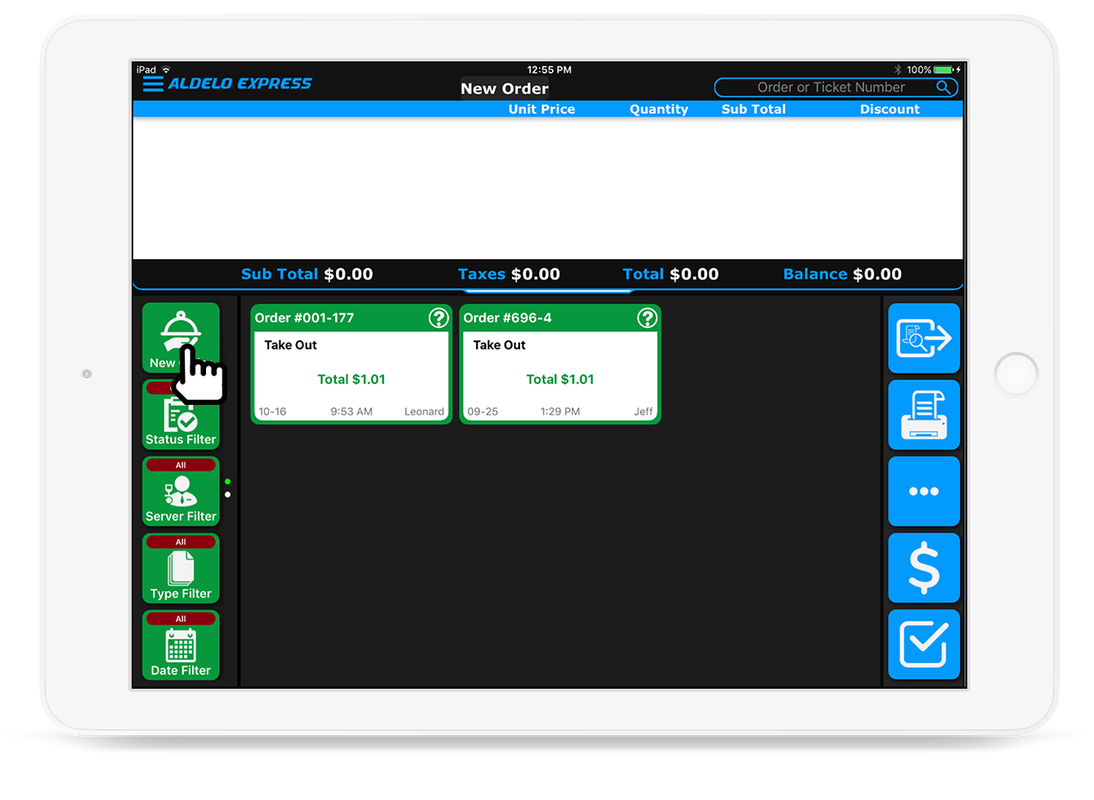
5. When you first log into the POS you are taken to the Recall screen which shows all of the current Open Orders. To start a new order click the New Order button on the left.
|
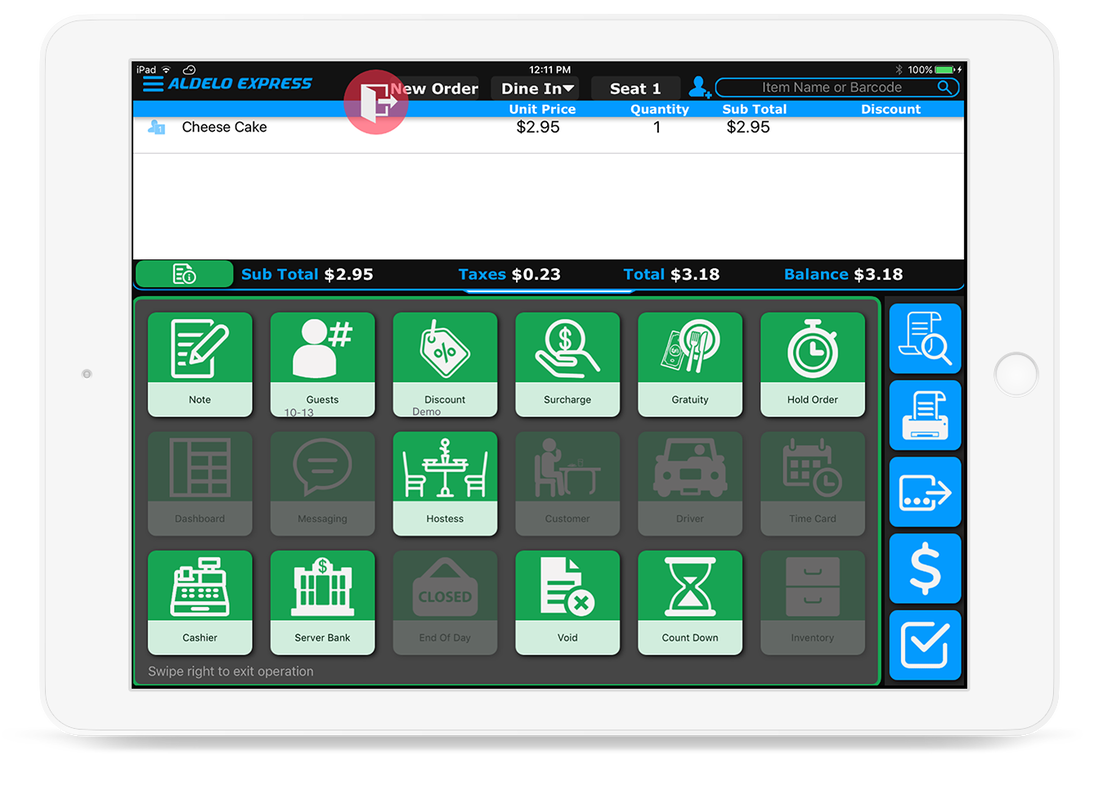
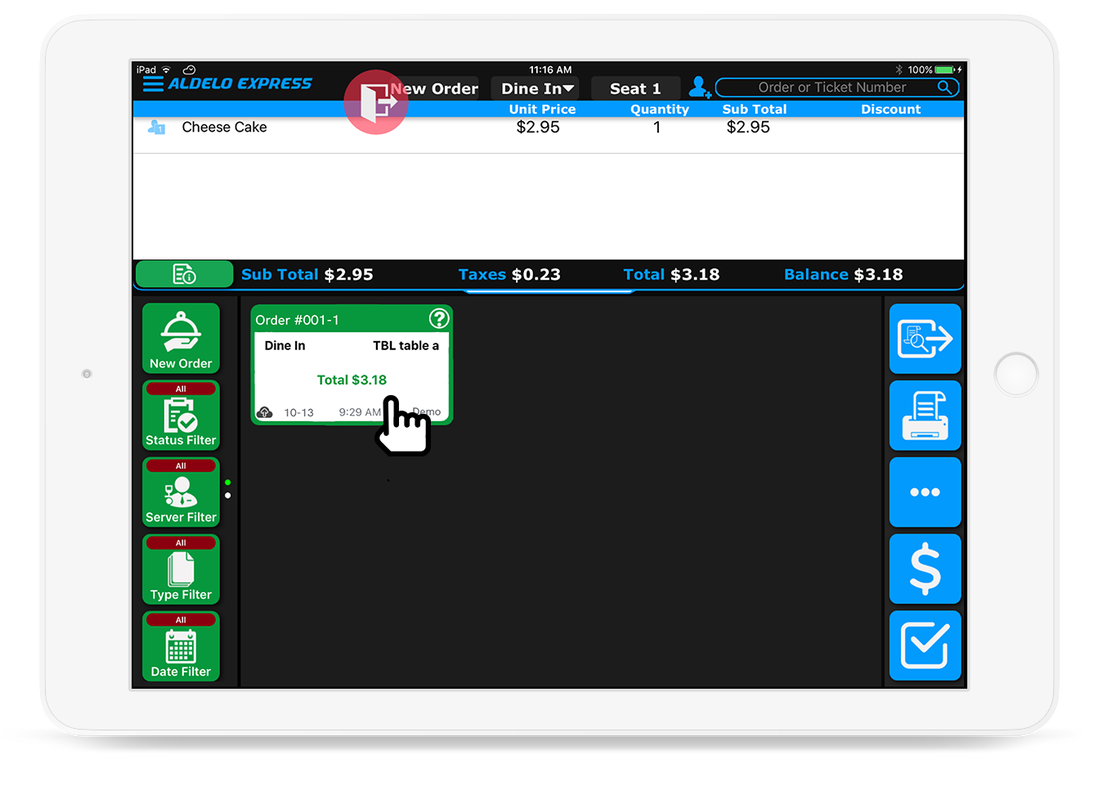
6. When you are in an order you are able to bring up multiple options by pressing the button with 3 dots on the right hand side. Press the button again to go back to the menu.
|
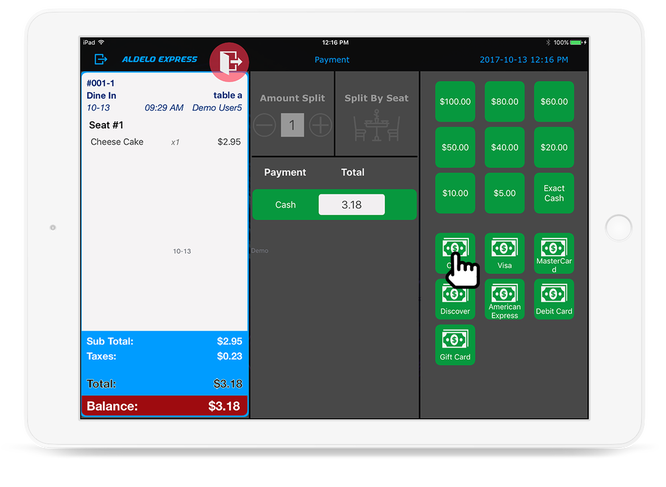
7. To Settle an Order you want to make sure that you are first Cashiered In which can be accomplished in the previous step. Once you are cashiered in just press the $ button.
|
8. You can selected preset amounts of cash, enter a specific value or choose credit card for your tender type.
|
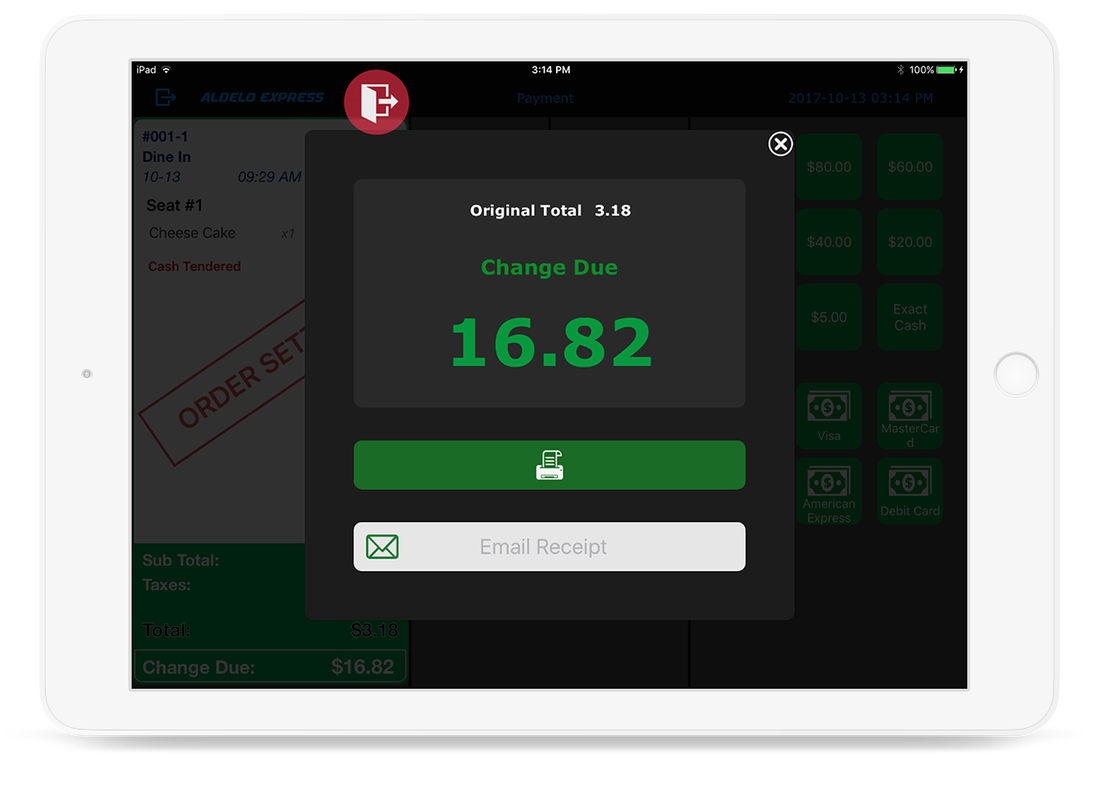
9. Once you enter in the amount you will be shown a screen with how much change is due, the option to print the receipt and a place to enter an email address to email the receipt.
|

10. Once you are done with the demo click the red exit button to return to the store creation screen.
|

1. Click on View a Demo or Create My Store.
|

2. Click Create My Store.
|
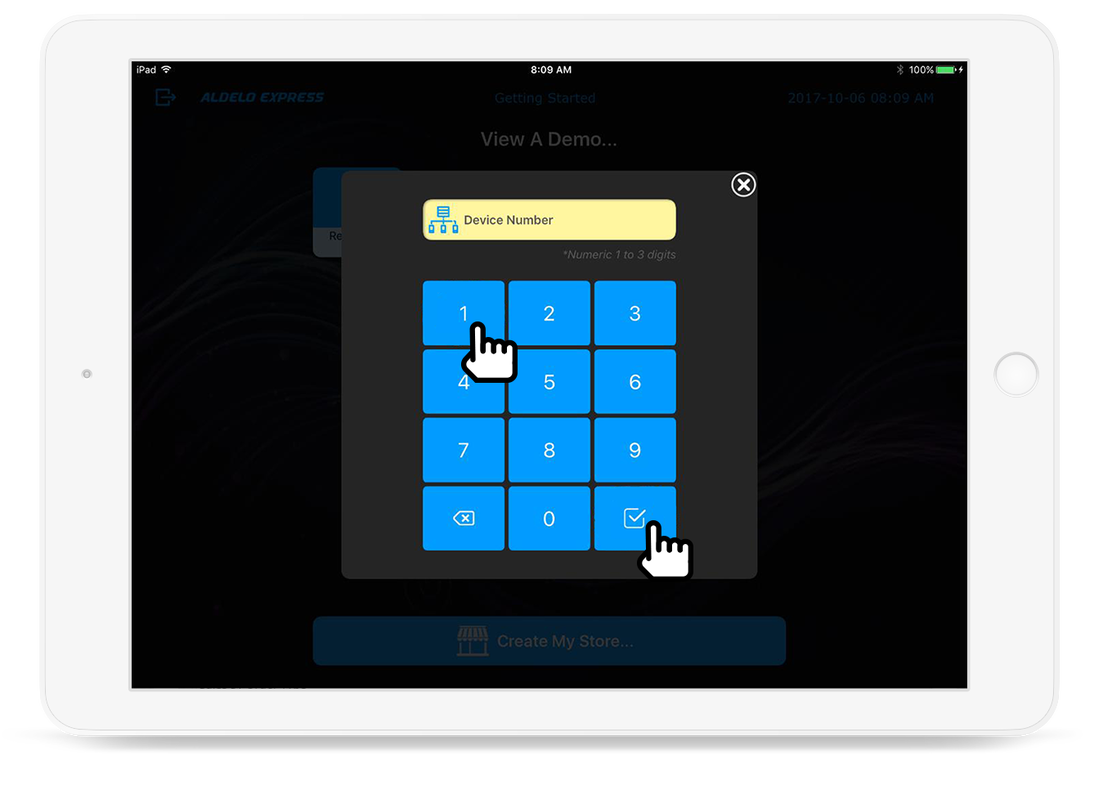
3. Assign a device number to this iPad. You may select any number from 1 to 999.
|
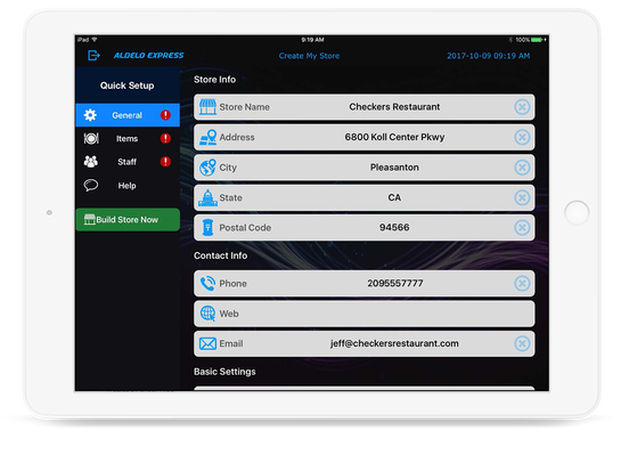
4. Fill in required information in the general screen.
|
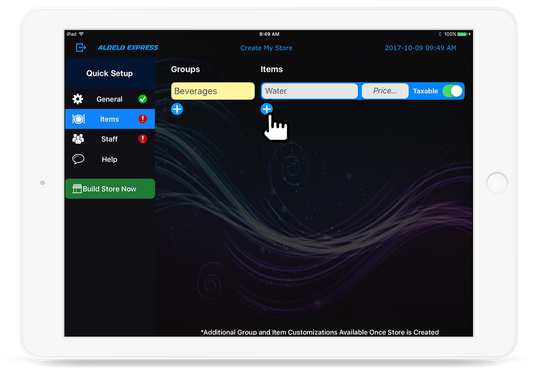
5. You can then quickly add items to the store. You may also add items through the Aldelo Express Cloud.
|
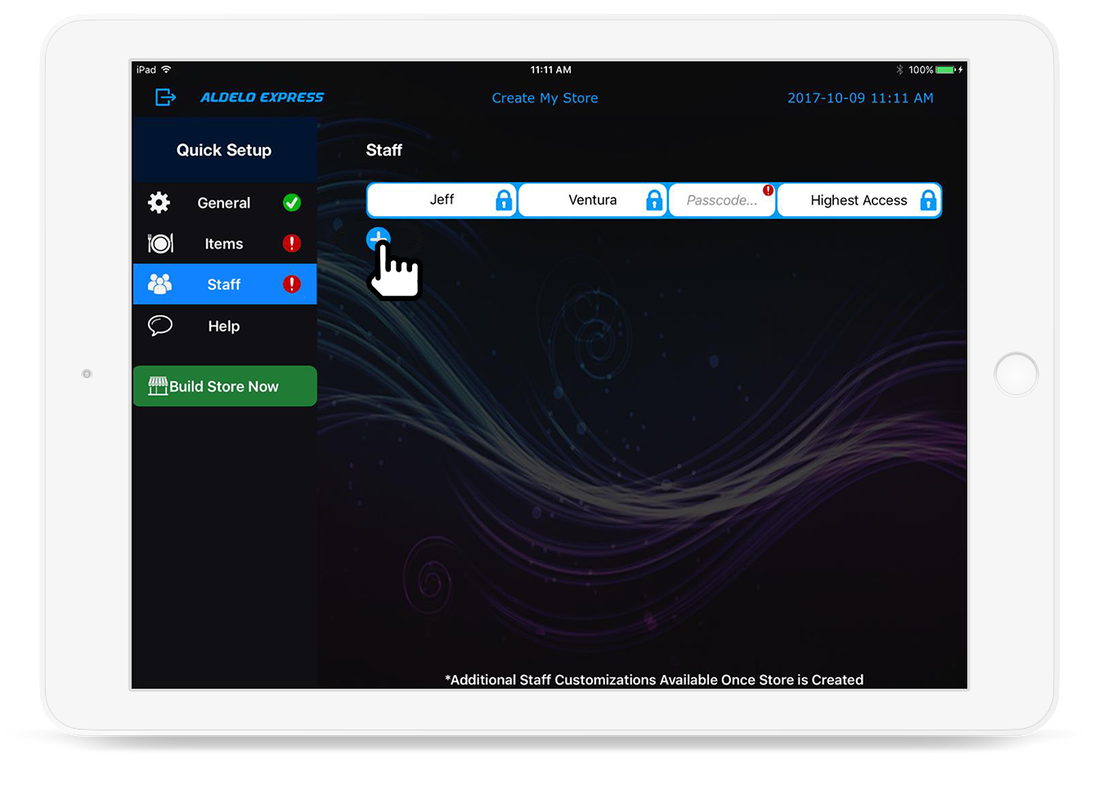
6. Fill in the employee Information. The pass code is what the employee will use to access the POS.
|
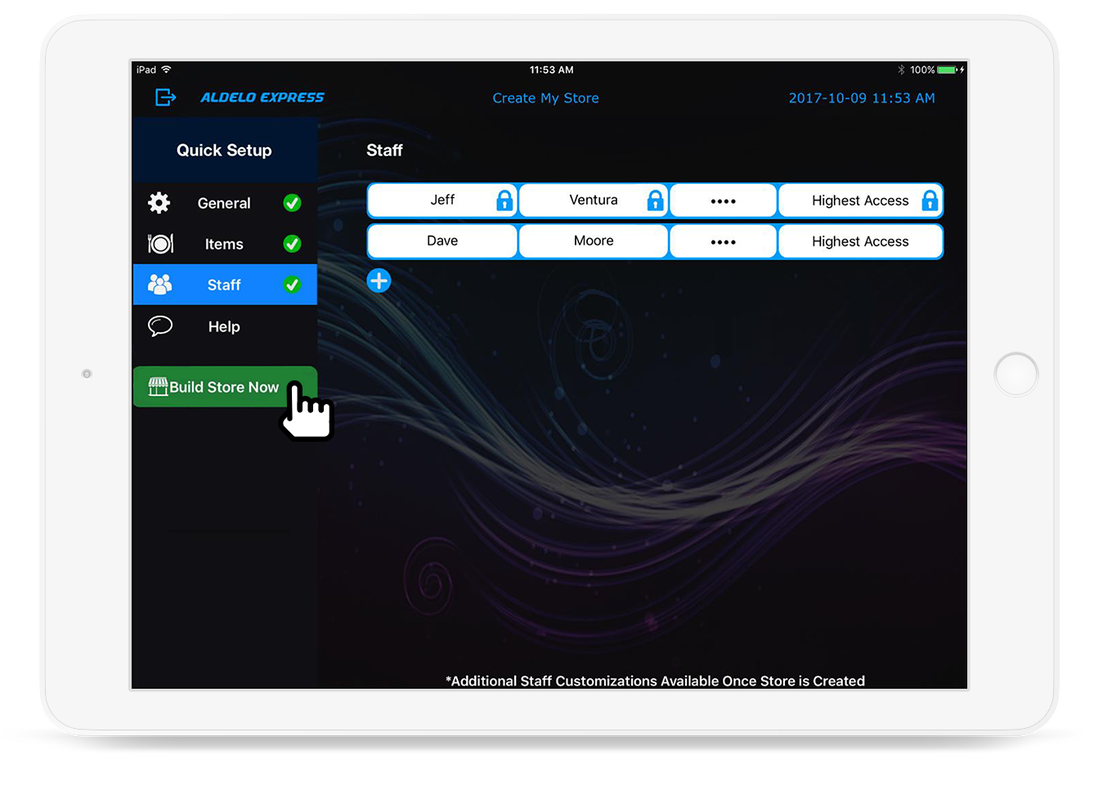
7. Build the store at anytime once all the necessary information is completed.
|
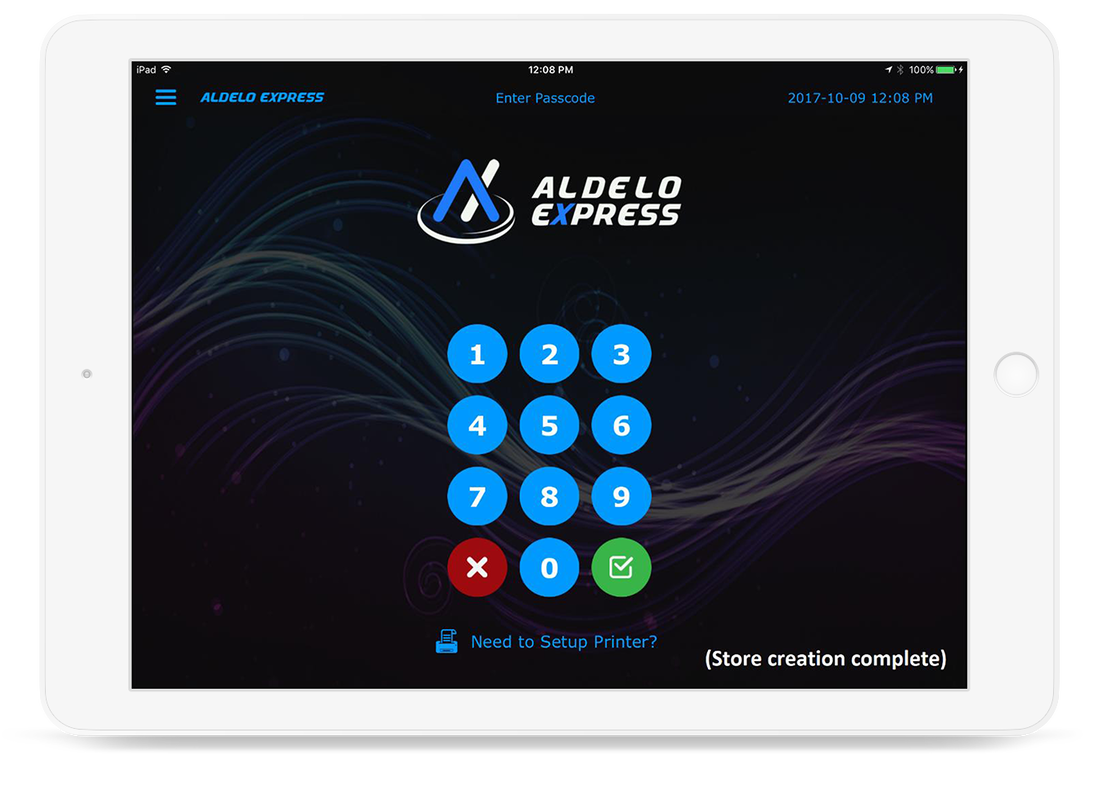
8. Store creation complete.
|

9. To activate an existing store on this iPad. Click on the store you would like to use.
|

10. Assign a device number to this iPad. You may select any number from 1 to 999.
|

11. The app will then load the menu and data for the store.
|
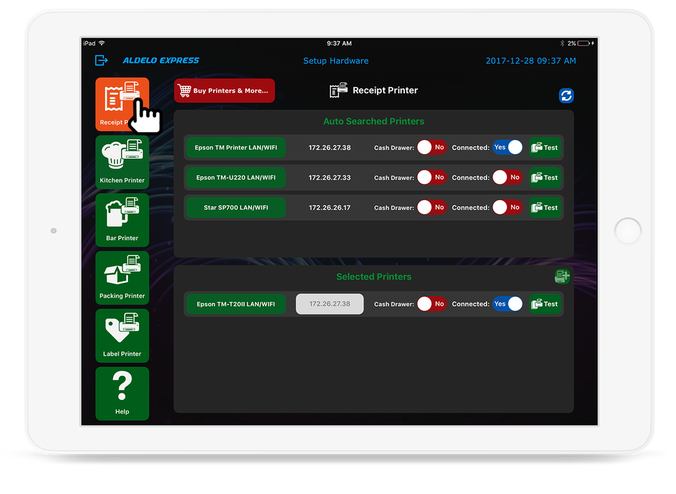
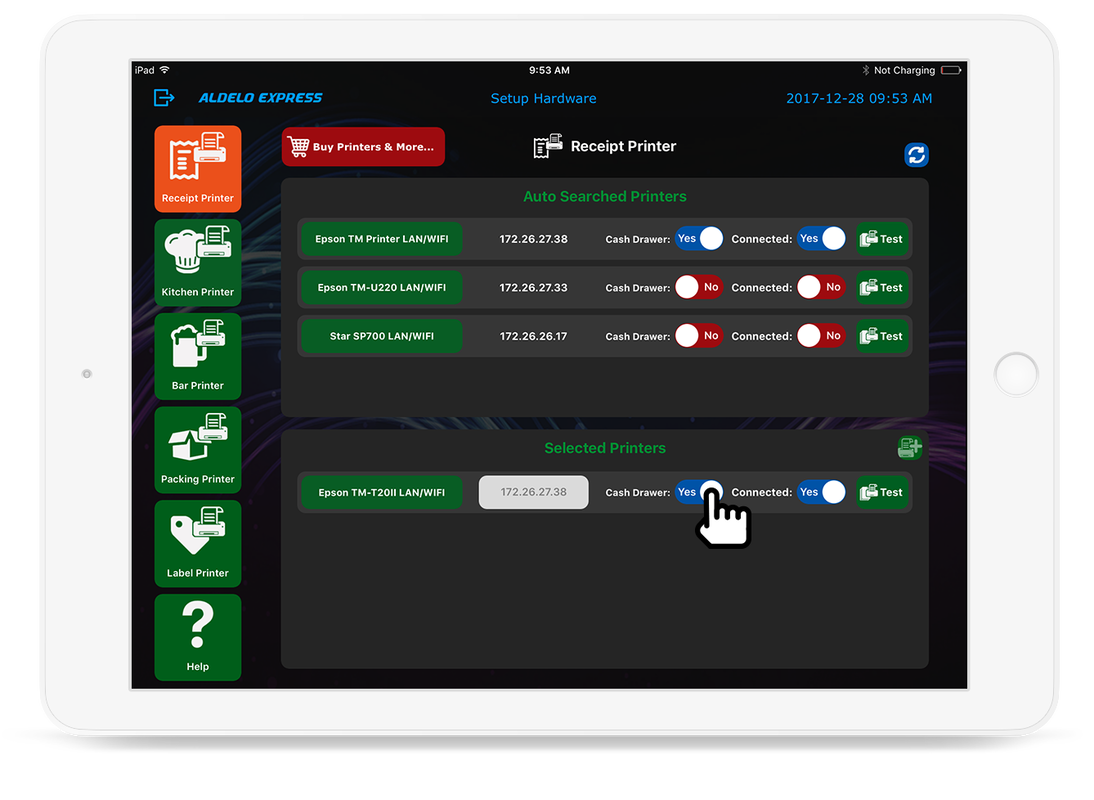
12. Click the menu icon on the top left and click hardware. The app will then detect the printers on your network. To add the printer all you need to do is set the Connected toggle to be Yes.
|

13. To add a Cash Drawer that is printer driven just select Yes on Cash Drawer.
|

14. You can also assign multiple kitchen printers and others.
|

|
TIPS: You don't have to enter all your product or staff list, you can always add more, edit, and access more advanced options in the Express Cloud anytime later.
|
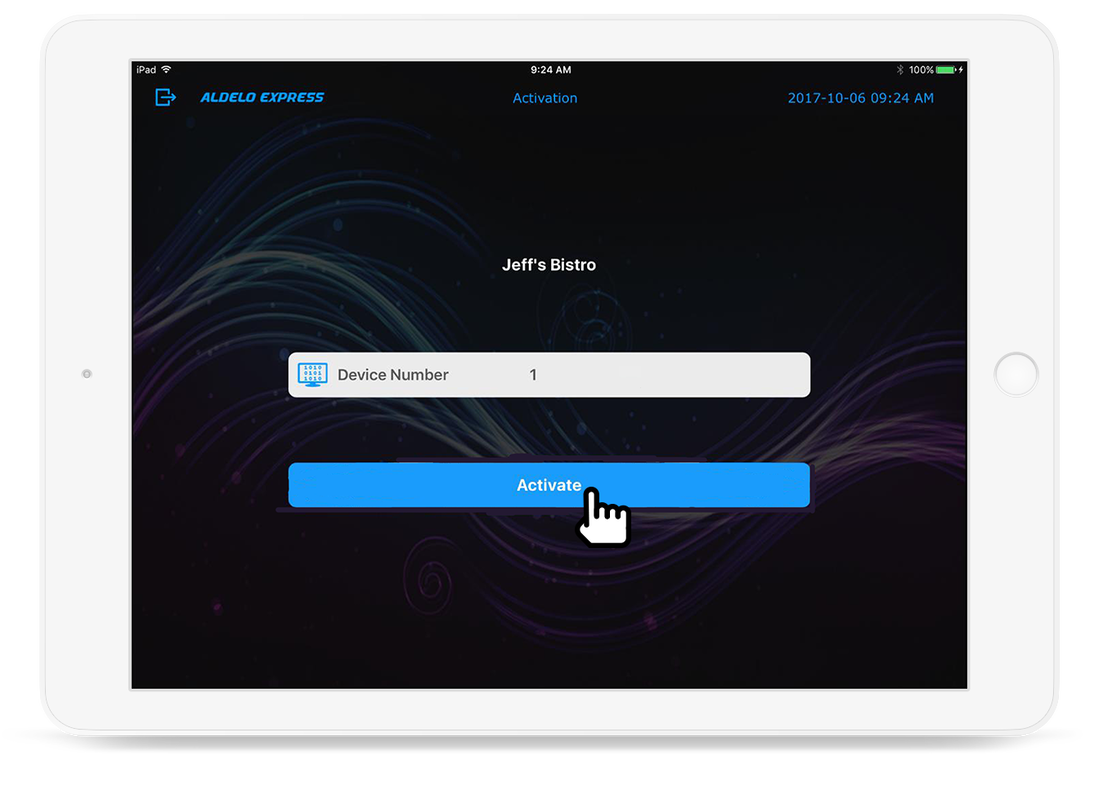
2. Enter the desired device number (1 - 999).
|
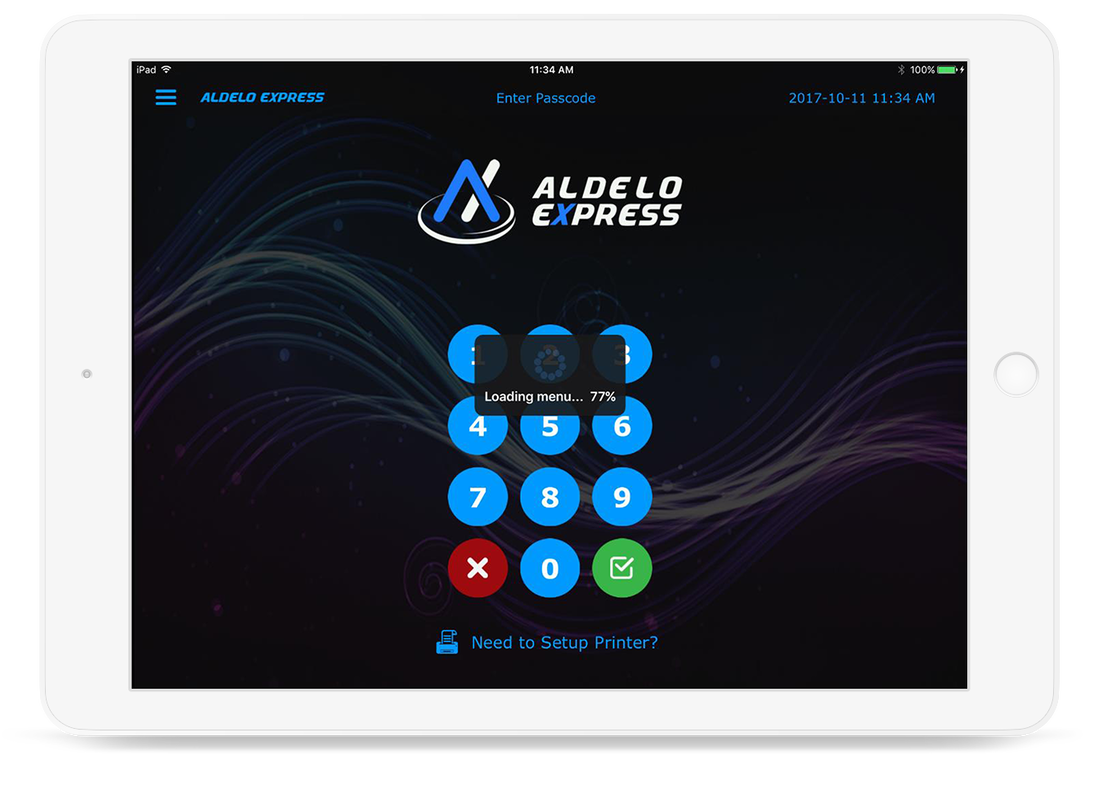
3. The app will then load the menu and data for the store.
|
4. Click the menu icon on the top left and click hardware. The app will then detect the printers on your network. To add the printer all you need to do is set the Connected toggle to Yes.
|
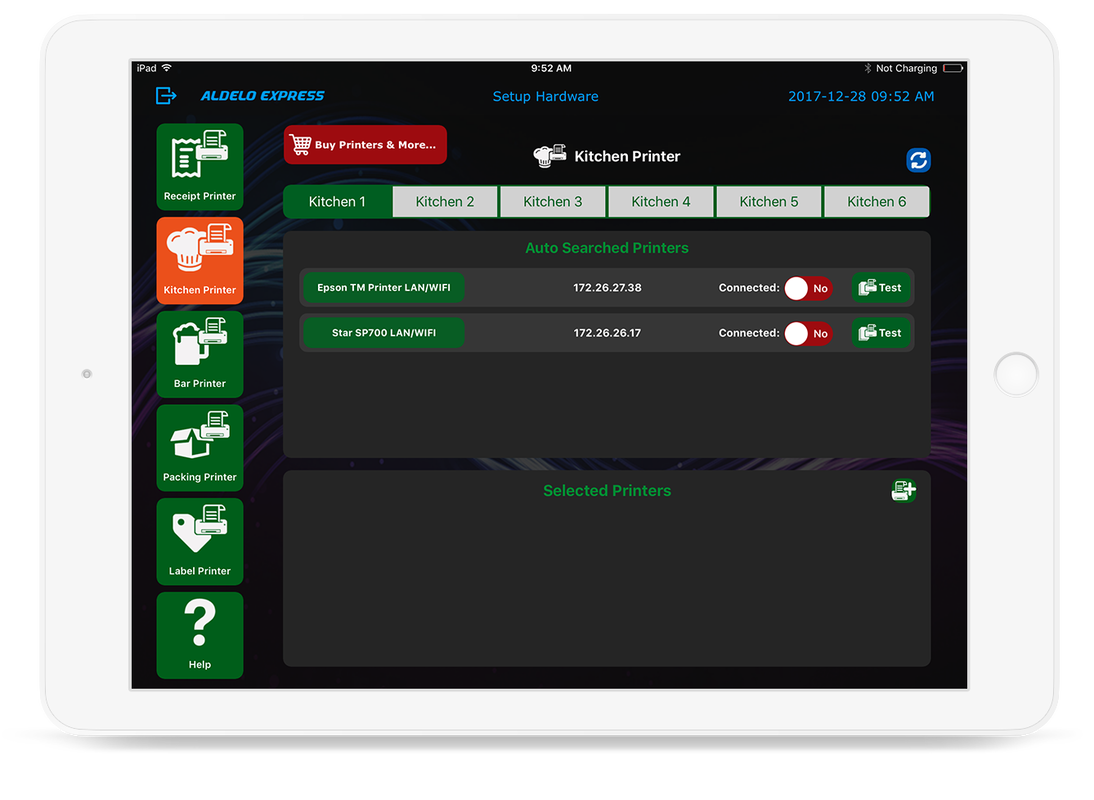
5. You can also assign multiple kitchen printers, bar printer and others here.
|

1. Enter in the employee access passcode.
|
2. When you first log in you will see the recall screen which show all open orders. To start a new order click the button on the left hand side of the screen.
|
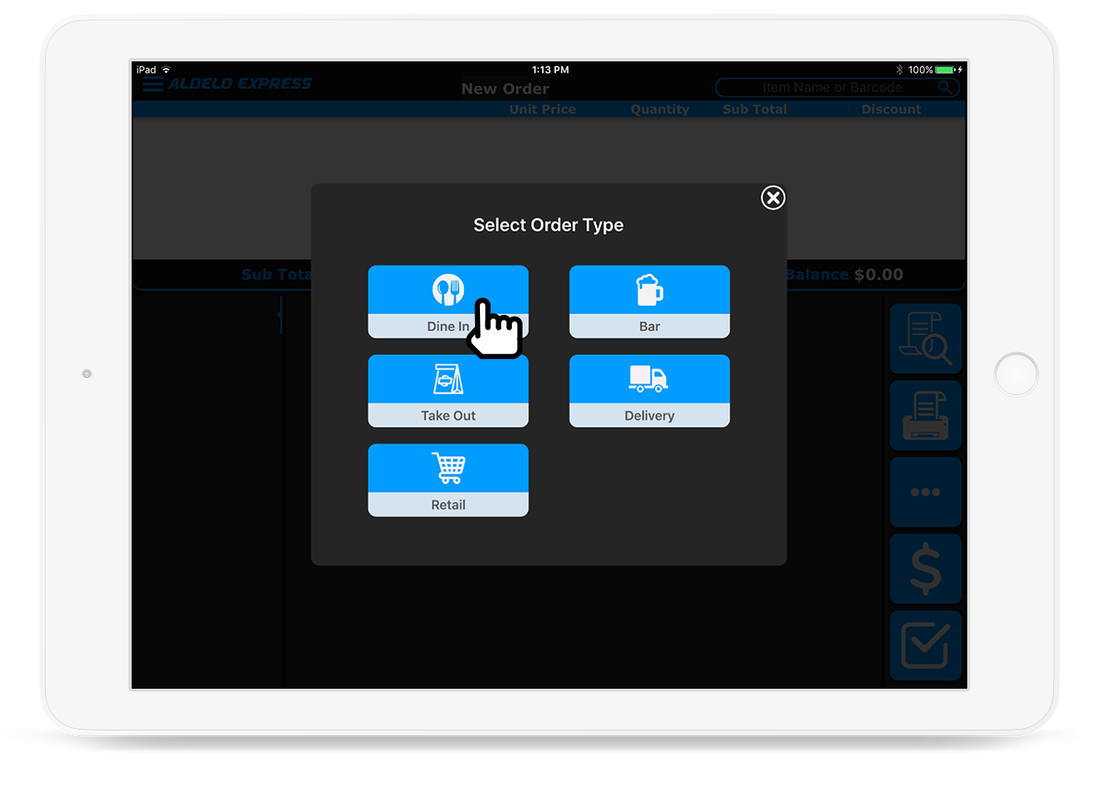
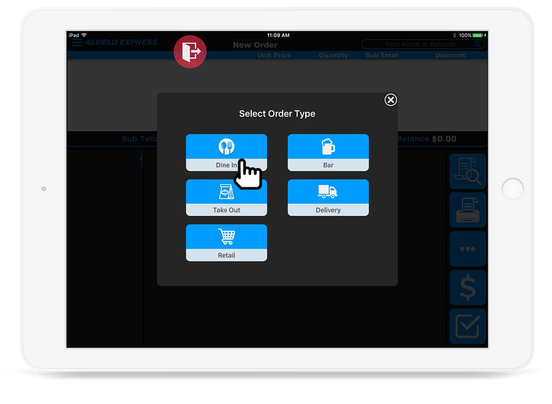
3. You will then be prompted to select the order type.
|
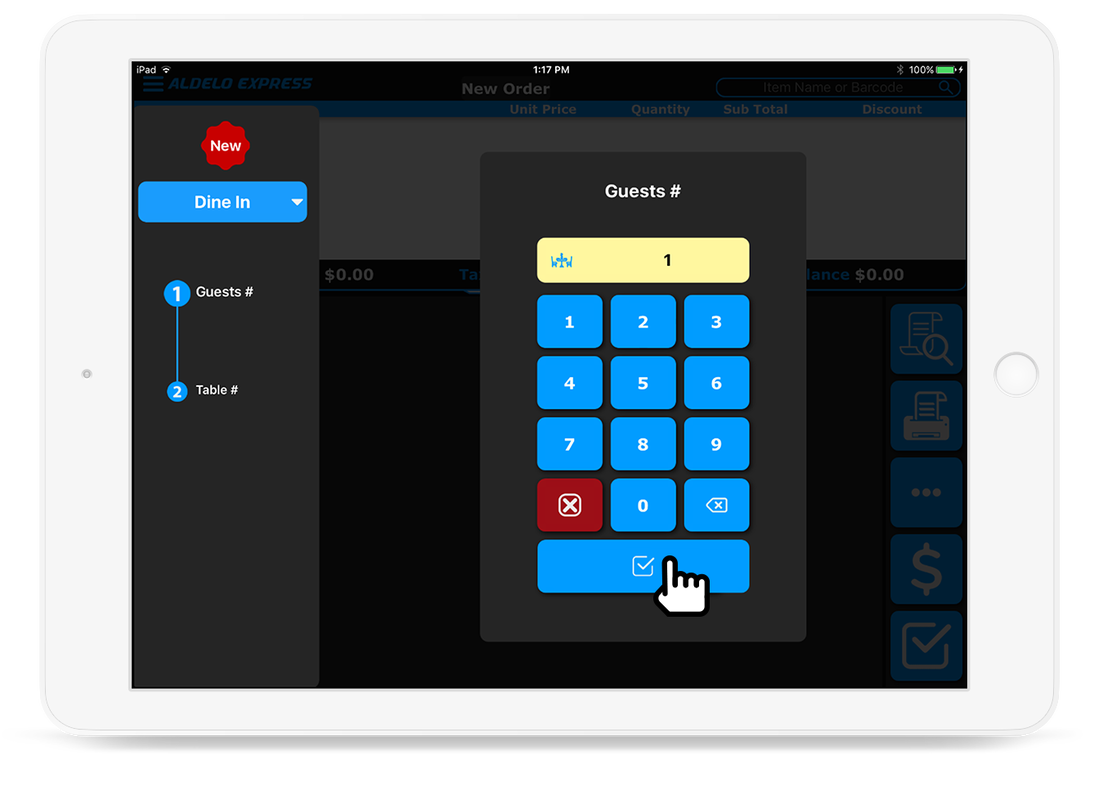
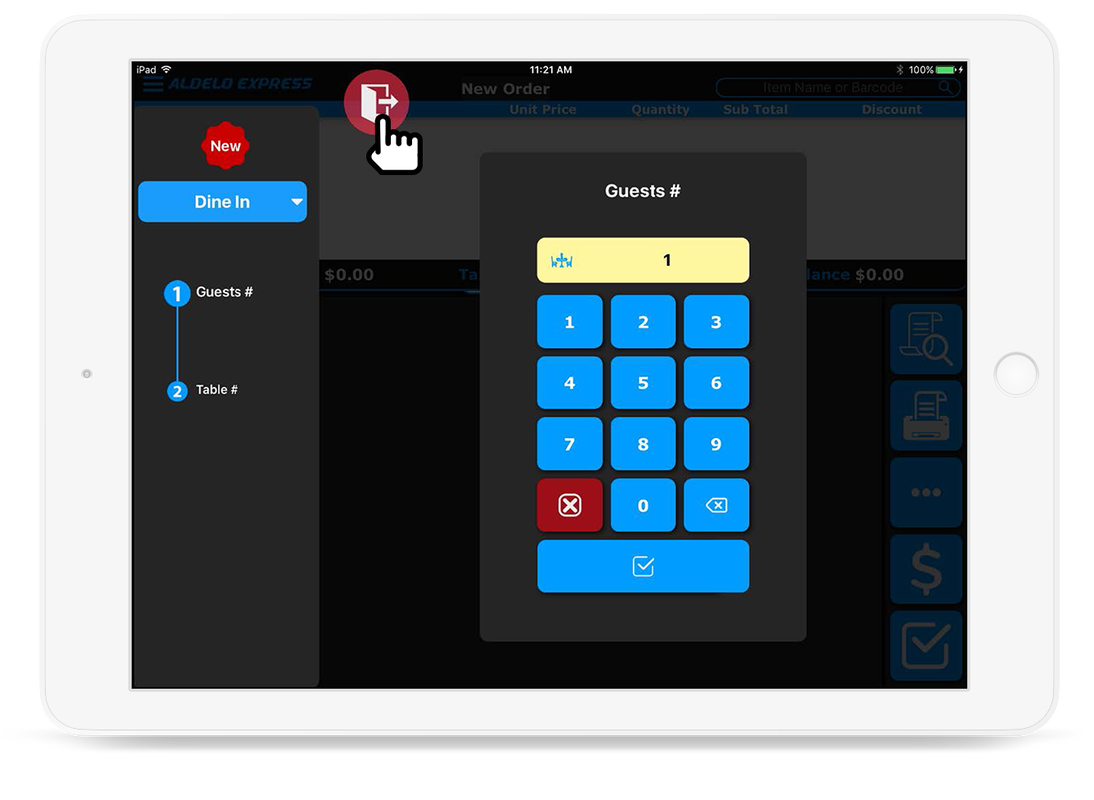
4. If applicable you will then be prompted for the guest count.
|
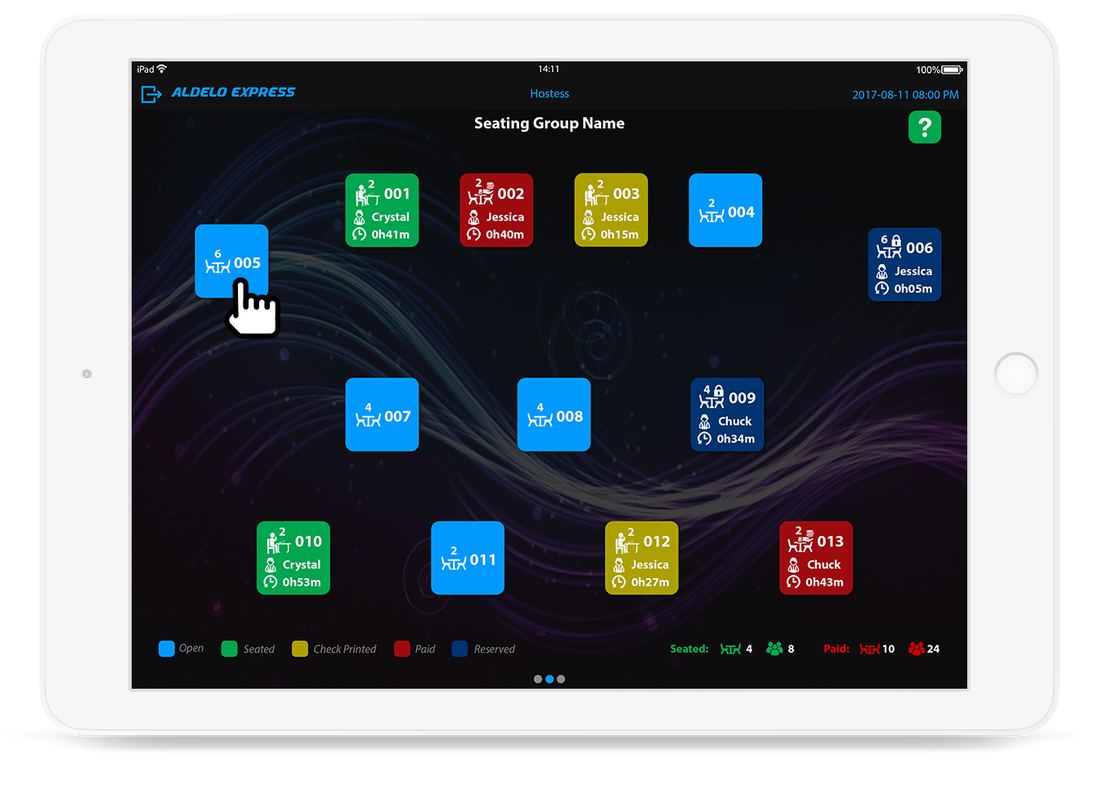
5. Then if applicable you will be prompted to select the table from the floor plan.
|
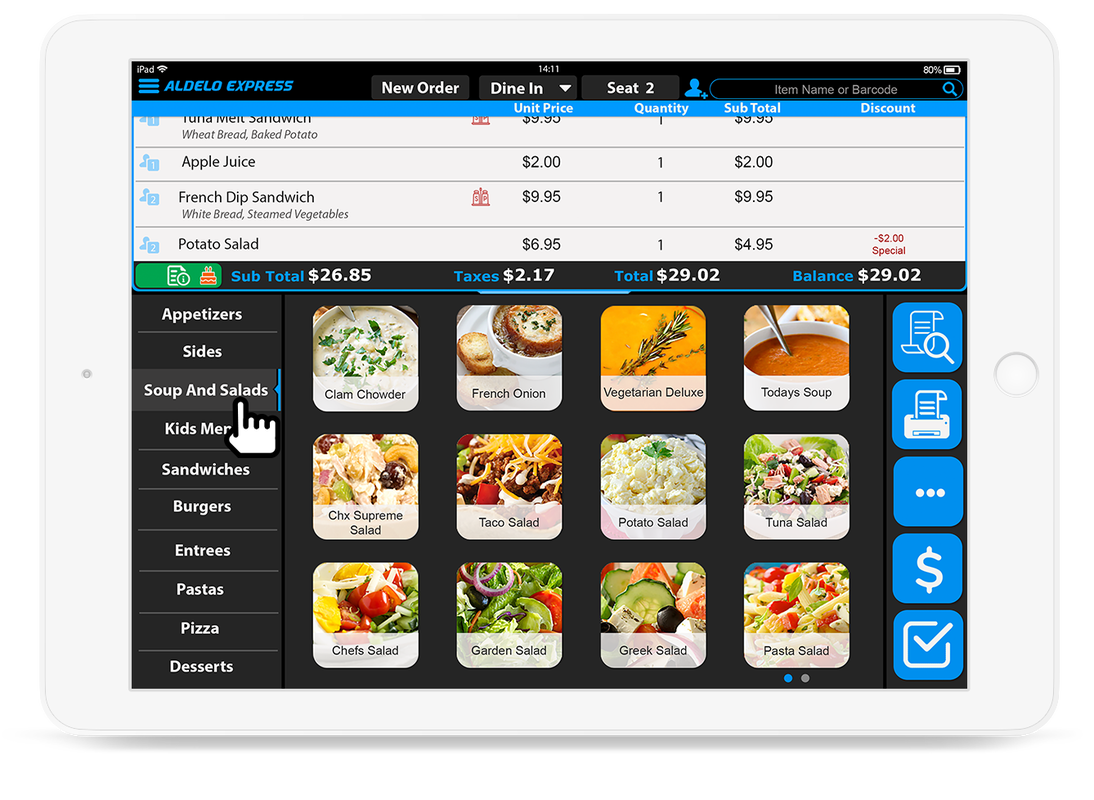
6. The menu groups are located on the left side of the screen.
|
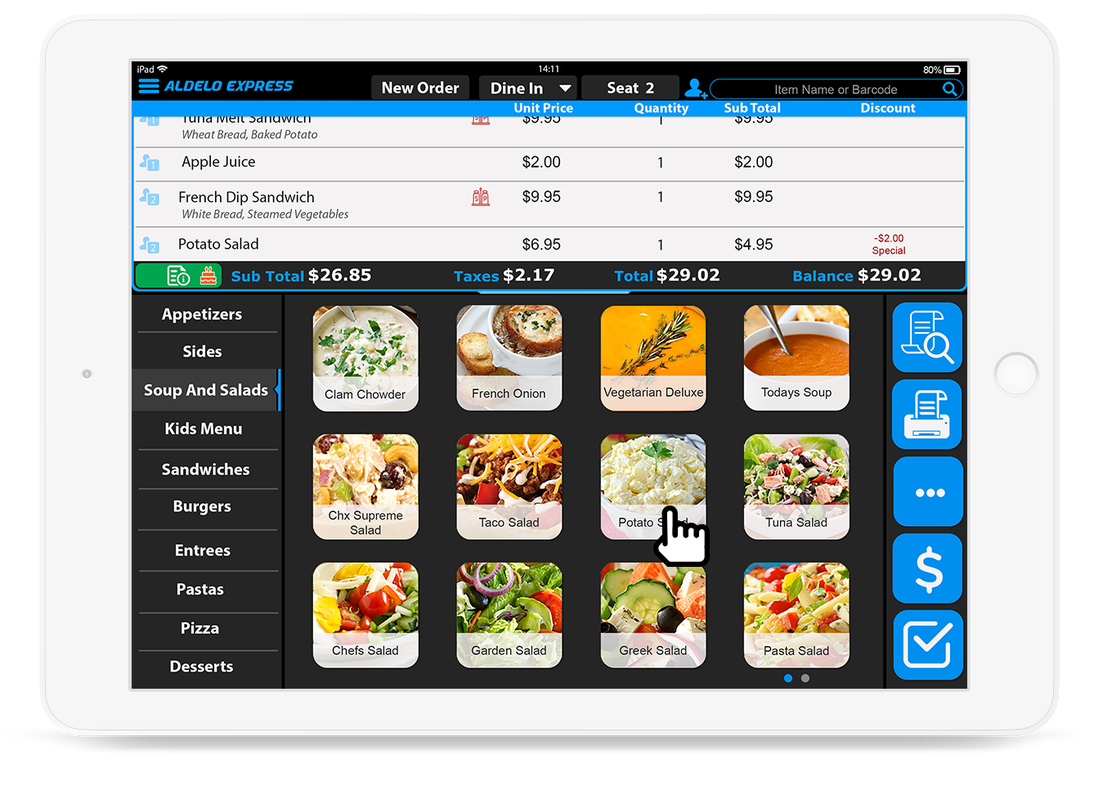
7. Click a menu item to order.
|
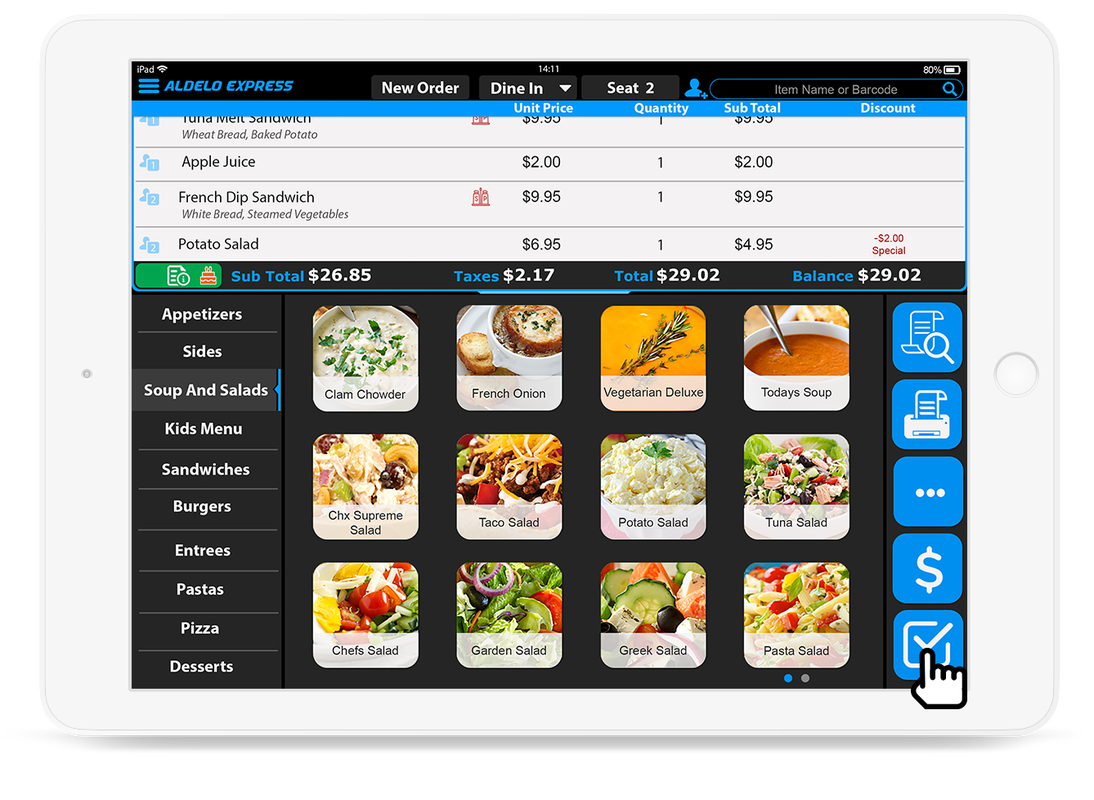
8. Upon order entry completion, click the Done button (indicated by the finger pointer).
|